Exercise 1 - Workflow management systems
Workflow management systems help to structure complex workflows. When a workflow has many steps with many different input and output files in different formats, using some kind of workflow management system can greatly help to increase readability and reusability and thus also reproducibility of your analyses. Once you will be familiar with workflow management, you will never turn back.
In this exercise we will introduce different ways how to automate workflows to increase productivity and reproducibility.
We will be using a very small test dataset to illustrate the principle of what we want to do.
The task is this: We want to combine the content of several files into a single file and convert all text in the combined file to lower case. The resulting file should be called lower1.txt. The data for this exercise is in additional-data/simple-workflow-example/input1 in the workshops repository.
First, let us prepare the working environment for today. Run these commands in your home directory:
$ mkdir day3
$ cd day3
$ git clone https://github.com/reslp/reproducibility-workshop.git
Exercise
Navigate to the directory reproducibility-workshop/additional-data/simple-workflow-example/input1 and familiarize yourself with the input data file. If possible try to come up with a solution to the proposed task in bash before reading on.
Using commandline scripting
As you probably figured out, what we want to do can be achieved by using a simple bash oneliner. Three possible solutions can be found here.
However we will now try to divide this command into individual steps for the sake of this exercise and then make an automated workflow out of it.
The command does several things (according the the first solution from the link above):
First, it gets a list of all
.txtfiles in theinput1directory by using the*expansion.It shows the content of all the files gathered by step 1 using
cat.It pipes the output of step 2 into
trwhich converts the streamed content to lower case.Finally the result is piped into a file called
lower1.txt
One solution to increase reproducibility is to keep more complex bash operations in shell script files, so they can be reused. How does this command look if we write a shell script.
$ cat workflow-scripts/workflow-single.sh
#!/usr/bin/env bash

rm -f combined1.txt lower1.txt # remove output from previous runs

files=$(ls input1/*.txt) # get input files (see 1 above)

for file in $files # the for loop helps to combine the files (see 2 above)
do
        cat $file >> combined1.txt
done

cat combined1.txt | tr [:upper:] [:lower:] > lower1.txt # convert the content of the intermediate file to lower case and pipe to lower.txt (see 3 and 4 above)
Hint
What we show here is probably overly complicated for a task like this. The point here is to show how to separate more complex tasks (and in the end complete bioinformatic analyses) into individual tasks. This is something you will have to do when you plan to develop a complex analysis pipleine.
Using a script already increases reproducibility quite a bit. We can take this script, transfer it to a different folder or computer and run it again to generate the final output lower1.txt. If we were to run it on the same input files again we would get the same output.
However, there are several potential pitfalls to keep in mind: One problem with an approach like this is that for complex analyses such a script can quickly become hard to understand. A solution would be to create different scripts (eg. for our test case step-1-get-input-files.sh step-2-combine-files.sh step-3-convert-to-lower.sh). This would help to detect errors and make the code easier to understand because each script only contains code for a single part of the analysis.
Another problem is that if you run a script again (on purpose or by accident) the script will recreate all results regardless of it is necessary or not. Why is this relevant? For one, complex bioinformatic analyses can take a significant amount of time and computational resources. Another aspect is that in many cases it is simply not necessary to recreate results. Only when input files or parameters change you will want to rerun an analysis. However, in large-scale projects with thousands of input and output files it is impossible to keep track which files could have changed. To address these issues (and more which we will see below) workflow management systems have been developed. We will now implement our simple test workflow using different workflow managers.
GNU Make
GNU Make, make or sometimes gmake was first introduced in 1976 to build the source code of Unix and it has a long and successful track record in computer science. Typically make is used to compile software from source code. Before make existed Unix was compiled using custom shell scripts. If you have installed software on Linux or Unix you may be familiar with commands like make, make install or make clean. As already mentioned make is usually used to compile software, however it can be used to automate almost any task and even large bioinformatics projects. For example LongStitch uses make as a workflow manager. We will now create our own small workflow using GNU Make.
How does make work?
Make uses the concept of rules. You can think of rules as individual tasks that are executed in a given order. The order is determined by the output of other rules. If we take our example from above, we have already identified the steps (and their order) for the whole workflow to complete successfully. Each rule has a target (the output) and one (or more) dependencies (the input). The rule then contains all instructions (the recipe) to build the output from the input. This is a common concept also in other workflow managers.
Hint
Let us summarize some important terms used in workflow managers again:
rule: A task that will be performed. Rules are usually ordered and have input and outputs.
target: The output of a rule. This can be one or many files or data.
prerequisites: The input of a rule. This can be one or many files or data as well.
recipe: The instructions of the rule that create the output from the input. This can be singel bash commands or long scripts external software.
Let’s have a look at the general structure of a rule in make:
targets: prerequisites
     recipe
     …
Now, here is how our task of converting a file to lower case could look like:
lower1.txt: combined1.txt
     cat combined1.txt | tr [:upper:] [:lower:] > lower1.txt
The target (output) of this rule is the file lower1.txt and the dependency (input) is combined1.txt. The recipe for this rule is the second line.
Typically all rules are combined into one or more so-called Makefiles which are named
Makefileormakefile.
Our simple test workflow in make
How would our simple test workflow look when written in make? For this we have again separated the different steps into individual tasks. Let us have a look at the complete Makefile and then discuss it.
$ cat workflow-scripts/Makefile-single
all: lower1.txt

combined1.txt: input1/*.txt
        for file in $^; do \
                cat $$file >> combined1.txt; \
        done

lower1.txt: combined1.txt
        cat combined1.txt | tr [:upper:] [:lower:] > lower1.txt

clean:
        rm -rf combined1.txt lower1.txt
In this makefile there are four rules: combined1.txt, lower1.txt, all and clean. The first two rules have file targets making it clear what they should do: Generate the files combined1.txt and lower1.txt. Let’s look at the combined1.txt rule in more detail:
1combined1.txt: input1/*.txt
2     for file in $^; do \
3             cat $$file >> combined1.txt; \
4     done
In the first line, the target and input is specified, seperated by a colon (:). We use input1/*.txt to expand to all *.txt files in the input1 directory. The recipe in the rule is a simple bash for loop. What is new here is the variable $^ which is make specific (look here for additional details). It holds a list of all input files which the for loop should iterate over. Also multi-line statements as given here (the recipe consits of lines 2-4) have to be separated by a backslash \. This is a peculiarity of make, which requires recipies to only contain one line of code. With the backslash make knows that the command continues in the next line. The third line contains the actual cat command. In bash we would write cat $file instead of cat $$file. Since make also has variables which start with $ we need to let make know that this is a bash variable which is why we need the extra $.
Tip
If you are familiar with bash scripting, makes way of formatting multiline commands and character escaping may look weird. Keep in mind that although it looks similar make is not bash and the syntax is different. Here are a few links where escaping is explained in more detail:
Now that we know the basic structure of make rules, the rule to create lower.txt should be self explanatory.
Special make rules
The rules all and clean are new and they don’t exist in the shellscript version of our pipeline. It is often quite useful to have these special rules in your makefile. If you have already build some software with make you will know that clean removes (intermediate) results and all is the rule to recreate all output. It is not necessary to have these special rules, but there are many cases where they become useful.
Execute a make workflow
Executing a make workflow is simple. You have to navigate to the directory where your makefile is located and execute make.
$ cp workflow-scripts/Makefile-single Makefile
$ make
for file in input1/A.txt input1/B.txt input1/C.txt input1/D.txt; do \
     cat $file >> combined1.txt; \
done
cat combined1.txt | tr [:upper:] [:lower:] > lower1.txt
$
Here are some other examples:
$ make combined1.txt # this will only create the combined file
make: 'combined1.txt' is up to date.
$ make clean # this will remove all files:
rm -rf combined1.txt lower1.txt
$ make all # equivalent to make (in this case)
Tip
You can also pass Makefile to make which have a different name with the -f``flag. For example you can write: ``make -f mymakefile.
This is it. Given that the makefile is correct and it finds all the files, this is all you have to do to execute the workflow and you should find the final output file lower.txt in the same directory.
Behind the scenes, make searches for a Makefile in the present directory and executes the first rule it finds in the file. Since the first rule is the all rule, which requires the lower.txt file, make will continue to search for a rule called lower.txt. It sees that the lower.txt rule requires the combined.txt file which is created in the according rule. The order of rule executon thus is: combined.txt -> lower.txt -> all.
Exercise
Play around with this workflow. Run make again and see what happens. Try to break the workflow by changing the Makefile. Which error messages do you get? Can you change the workflow so that it only usestwo files instead of four? Can you add another rule (eg. to create another file in upper case)? Here you can find solutions to this exercise.
Parallelization with make
Our workflow has one major flaw. Currently our workflow works only with a single input. How can we extend this to multiple inputs and run rules in parallel? This is something we typically want to do in large scale analyses to use computational resources optimally and reduce runtimes as much as possible. Consider the following Makefile which is extended for multiple inputs:
 1$ cat workflow-scripts/Makefile-multi
 2all: lower1.txt lower2.txt
 3
 4combined%.txt: input%/*.txt
 5        for file in $^; do \
 6                cat $$file >> $@; \
 7        done
 8
 9lower%.txt: combined%.txt
10        cat $^ | tr [:upper:] [:lower:] > $@
11
12clean:
13        rm -rf combined*.txt lower*.txt
As you can see we are now using a second input directory. The logic here is that we are using the same naming scheme for input directories so make can find them. In this case: input1 and input2. Make then uses a concept called wildcards to match the names of input and output files. In make we can specify a placeholder for whichever values a wildcard can have in file paths with %. You can read the wildcards chapter in make’s documentation for more details on wildcards and how to use them. There are different types of wildcards which serve different purposes (eg. * is also a wildcard).
Exercise
Think about how many wildcards we have and which values they can take. Let’s discuss this.
There are a few additional changes to the Makefile compared to the version written for only a single input. For example we needed to use the special variable $@ in line 9 above which refers to the target (output) of the rule as well as the $^ which we have already seen earlier. This is simply because we don’t know the value of a wildcard before the rule gets executed. Make will automatically fill in the correct values as we execute the workflow. Additionally, the clean rule has to now delete additional files.
We can now execute the workflow in parallel:
$ make clean
$ cp workflow-scripts/Makefile-multi Makefile
$ make all -j 2 #this will run two jobs in parallel
Exercise
Your task now is to apply this logic and extend your workflow to use parallelization. Make sure that you have at least three input directories and then run the workflow in parallel. As an extra, can you add another rule to combine all the lower case files into a single output file?
Many more possibilities
The example above only barely scratches the surface of what you can do with make. There are many extensions, for example also a variant called biomake which is compatible with most of GNU make’s features but extends GNU make by adding support for HPC cluster job submission systems and multiple wildcards per target. Make has a great documentation and a very long and successful track record in many large scale projects. For reproducibility make can be a very handy tool. It will make your workflows more transparent and much better structured with almost unlimited reusability. If this has spawned your interest in make here are some links with more information:
Learning Make (with an example on how to incorporate R)
We will soon look at workflow management systems tailored more specifically for bioinformatics however everything we will show you can also be done with make (although sometimes with a bit more effort).
Hint
The concepts of rules and wildcards which we introduced now with make are also very important in other workflow managers. It is important that you familiarize with them well.
Snakemake
Snakemake is another commonly used workflow management system with lots of features. Many bioinformatics pipelines use snakemake such as our own phylociraptor. Snakemake also heavily uses the concept of rules and wildcards and has many features allowing it to operate on HPC clusters, or other cloud computing infrastructures such as AWS, Google cloud and a lot more. Snakemake is developed rapidly and it can happen that snakemake pipelines written in older versions of snakemake have to be adjusted in newer versions. It is therefore important to be version specific when using it.
We have installed snakemake in a conda environment for you already. You can activate it like so:
$ conda activate serpentesmake
(serpentesmake) $ snakemake -v
5.9.1
The corresponding yaml file of the environment is in the repository in additional-data/conda-environments/serpentesmake.yml. Here is the content of this file:
name: serpentesmake
channels:
  - conda-forge
  - bioconda
  - defaults
dependencies:
  - snakemake==5.9.1
prefix: /home/ubuntu/conda/miniconda3/envs/serpentesmake
The test workflow in snakemake
Snakemake is written in python and also its syntax is basically a python dialect. In snakemake you can also use pure python in many cases. This makes it easier to get started if you are already familier with python. Let us look at our example workflow. You will surely recognize the similarity with python.
 1(serpentesmake) $ cat workflow-scripts/Snakefile-single
 2rule combine:
 3        input: "input1/A.txt", "input1/B.txt", "input1/C.txt"
 4        output: "combined1.txt"
 5        shell:
 6                """
 7                cat {input} >> {output}
 8                """
 9
10rule lower:
11        input: rules.combine.output
12        output: "lower1.txt"
13        shell:
14                """
15                cat {input} | tr [:upper:] [:lower:] > {output}
16                """
17rule all:
18        input: "lower1.txt"
In snakemake rules are specified by the keyword rule followed by the rule name. Snakemake follows the indentation style of python. You are not allowed to mix different styles (spaces and tabs) to indent line. Rules in snakemake have different directives such as input:, output: and shell:. input: and output: require one or more files which will be used by the rule as input and output. The shell directive is where the code we would like to execute is located. We can also access our input and output inside the shell part of the rule with curly brackets {}. In snakemake rules can be connected by the output of other rules (similar to GNU make) directly through the rules object: rules.combine.output. In practice this is a nice feature because the connection between the rules will stay intact even if you change the name of the output file in the combine rule.
Similar to GNU make we can have an all rule. As you can see, the all rules does not have an output. It only requires the lower1.txt file as input.
There are many additional directives in snakemake to modify how rules work. For example you can specify a conda yml file with conda:. Snakemake will then create and activate a conda environment for you and run the code in the shell part inside this environment. Similarly with container: you can specify a singularity container which is then used as runtime environment for you code. With params: you can specify additional parameters eg. values read from a YAML file.
Executing snakemake workflows
Similar to GNU make, snakemake expects a file with all the rules to be present where you run your workflow. This file is called Snakefile. If the Snakefile exists, you can run the workflow like so:
(serpentesmake) $ rm *.txt # make sure all output files from previous runs are removed first
(serpentesmake) $ cp workflow-scripts/Snakefile-single Snakefile #copy Snakefile
(serpentesmake) $ snakemake --cores 1 all
Building DAG of jobs...
Using shell: /bin/bash
Provided cores: 1 (use --cores to define parallelism)
Rules claiming more threads will be scaled down.
Job counts:
     count   jobs
     1       all
     1       combine
     1       lower
     3

[Wed Jul 13 09:43:15 2022]
rule combine:
    input: input1/A.txt, input1/B.txt, input1/C.txt
    output: combined1.txt
    jobid: 2

[Wed Jul 13 09:43:15 2022]
Finished job 2.
1 of 3 steps (33%) done

[Wed Jul 13 09:43:15 2022]
rule lower:
    input: combined1.txt
    output: lower1.txt
    jobid: 1

[Wed Jul 13 09:43:15 2022]
Finished job 1.
2 of 3 steps (67%) done

[Wed Jul 13 09:43:15 2022]
localrule all:
    input: lower1.txt
    jobid: 0

[Wed Jul 13 09:43:15 2022]
Finished job 0.
3 of 3 steps (100%) done
Complete log: /home/user22/day3/reproducibility-workshop/additional-data/simple-workflow-example/.snakemake/log/2022-07-13T094315.367603.snakemake.log
$
Snakemake has many additional parameters which you can use to change its behavior. It can become overwhelming quickly If you look at snakemake --help and specific snakemake commands can quickly become very long! Here are some additional parameters we think are important to get started with snakemake:
-pprints also the code inside the shell directives on screen.-n, --dry-runperforms a dry run. This lists all the rules to be executed without actually running them--until myrulerun workflow until rule myrule.-c, --coresmaximum number of cores to be used in parallel.-f, --forceforce a rerun of the selected target rule.-F, --forceallforce rerun of workflow.--use-conda, --use-singularity, --use-envmodulesif you want to use containers, conda or environment modules.
The snakemake rulegraph
A rulegraph shows the relationships between different rules and how they are connected. This rulegraph for our test workflow is quite simple and linear. Rulegraphs of complext pipelines can look very different as rules can themselfes depend and be the dependency of multiple other rules.
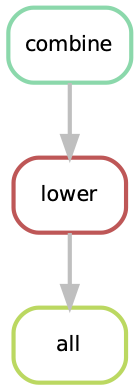
From this graph we assume that our workflow works as we indended. In more complex situations, rulegraphs can be a nice way to find dependency problems and it is a great way to show what the workflow does.
Exercise
Create a snakefile and run the workflow. Figure out how to create a rule-graph of the workflow. A solution can be found here.
Generalizing the workflow
Similar to Nextflow and make we can make this workflow more general and extend it to allow multiple input. We will be using the concept of wildcards again, which we introduced in the section on GNU make. We have learned that wildcards are placeholders and can take any value. Similar to make snakemake operates on files, so typically wildcards take a part of a file or directory name or path as values. The wildcard system of snakemake is much more flexible than that of GNU make. However as mentioned flavors of make exist with a more comprehensive wildcard system.
First, let us see how our workflow looks when we extend it to use wildcards. The input directories are again called input1 and input2.
 1(serpentesmake) $ cat workflow-scripts/Snakefile-multi
 2mynumbers = [1, 2]
 3
 4rule combine:
 5        input: "input{number}/"
 6        output: "combined{number}.txt"
 7        shell:
 8                """
 9                cat {input}/*.txt >> {output}
10                """
11
12rule lower:
13        input: rules.combine.output
14        output: "lower{number}.txt"
15        shell:
16                """
17                cat {input} | tr [:upper:] [:lower:] > {output}
18                """
19rule all:
20        input: expand("lower{number}.txt", number=mynumbers)
What has changed? The first line now contains a python list with all the values our wildcard can have. In this case 1 and 2. The inputs and output of the rules has changed as well: We need to somehow let snakemake know where the values of the wildcard need to be filled in. In this case the wildcard value is a part of the input directory name or the name of the output files. The name of the wildcard is {number}. This uses the same placeholder syntax with {} as we have seen earlier.
Hint
Wildcards can take any name. Instead of number we could for example also call it x or myawesomewildcard. However the name needs to be the same in all rules (except for the all rule which uses expand; see below) so that snakemake is able to propagate the value of the wildcard from rule to rule. It is generally a good idea to have informative wildcard names as this will make it easier to debug problems.
Now, how does snakemake know which files it should generate and which rules it needs to run? This information comes from the all rule. The input has changed to input: expand("lower{number}.txt", number=mynumbers). expand will create a list of files in which it substitutes the wildcard {number} with all the values from the list given in the first line of the file called mynumbers. This is equivalent as if we would specify the input as input: "lower1.txt", "lower2.txt".
Let’s make a dry run of the workflow:
(serpentesmake) $ rm -rf *.txt # remove output from previous runs
(serpentesmake) $ cp workflow-scripts/Snakefile-multi Snakefile
(serpentesmake) $ snakemake all -n
Building DAG of jobs...
Job counts:
     count   jobs
     1       all
     2       combine
     2       lower
     5

[Wed Jul 13 09:46:58 2022]
rule combine:
    input: input1/
    output: combined1.txt
    jobid: 3
    wildcards: number=1


[Wed Jul 13 09:46:58 2022]
rule combine:
    input: input2/
    output: combined2.txt
    jobid: 4
    wildcards: number=2


[Wed Jul 13 09:46:58 2022]
rule lower:
    input: combined2.txt
    output: lower2.txt
    jobid: 2
    wildcards: number=2


[Wed Jul 13 09:46:58 2022]
rule lower:
    input: combined1.txt
    output: lower1.txt
    jobid: 1
    wildcards: number=1


[Wed Jul 13 09:46:58 2022]
localrule all:
    input: lower1.txt, lower2.txt
    jobid: 0

Job counts:
     count   jobs
     1       all
     2       combine
     2       lower
     5
This was a dry-run (flag -n). The order of jobs does not reflect the order of execution.
As you can see each rule will now be executed twice execpt the all rule.
Exercise
Add additional values for the wildcard and make another dry run of the workflow. What happens?
Parallelization with snakemake
Snakemake is great at performing different tasks in parallel. Parallelization can be specified independently for each rule with the threads directive. For example this would tell snakemake to run the lower rule using two threads:
rule lower:
        input: rules.combine.output
        output: "lower{number}.txt"
        threads: 2
        shell:
                """
                cat {input} | tr [:upper:] [:lower:] > {output}
                """
This does not automatically mean that the rule runs faster. It just means that snakemake tries to allocate two threads when it executes the rule. Additionally the number of threads needs to be specified by snakemake’s -c flag. By default each rule uses only one thread. If you call snakemake -c 1 the execution of rules will be strictly serial (similar to calling make without additional flags). This global setting also overrides settings of individual rules. If you would like to use parallelization with snakemake you have to specify at least two threads: snakemake -c 2. In our example, the lower rule uses two threads and the rest of the rules use only a single thread, which means that snakemake would run the two combine rules simulaneously (because the use only a single thread) and run each lower rule one after the other (because each of them uses two threads). Snakemake is smart to fill up the available threads as much as possible. Using threads and parallelization because especially important with complex workflows.
Nextflow
Another, slightly different workflow manager is Nextflow. It follows a slightly different paradigm than make and Snakemake and it uses a different terminology. Rules are called processes and different processes communicate through so-called channels. A channel is similar to a pipe in the Linux shell, but there is a bit more to it. If you are interested, you can look here to learn more. One big difference to make and snakemake is that in Nextflow input and output of different processes do not necessarily have to be files. Rather, values can be passed between processes without writing intermediate results to files. This can be very nice to reduce the number of files but it can also make it more complicated if you are not familiar with piping. To make this nextflow example easier to compare with the same implementation in make and snakemake, we will create outputfiles for all intermediate steps. Nextflow is based on Java mainly using the Apache Groovy super-set. We are no experts with Nextflow, however we wanted to show you how it looks in case it is a system that you would like to pursue further. Here is how our workflow looks like:
 1$ cat workflow-scripts/workflow.nf
 2params.indir = "$baseDir/input1/"
 3
 4process combine {
 5    input: path indir
 6    output: file "combined1.txt"
 7    shell:
 8        """
 9            for file in \$(ls $indir/*.txt); do
10                cat \$file >> combined1.txt
11            done
12        """
13}
14
15process lower {
16    input: file "combined1.txt"
17    output: file "lower1.txt"
18    shell:
19       """
20          cat combined1.txt | tr [:upper:] [:lower:] > lower1.txt
21       """
22}
23
24workflow {
25    combine(params.indir) | lower | view
26}
As you can see the syntax is a bit different to what we have seen so far. Let’s disect it a bit. Individual processes are declared with the keyword process followed by a name. The whole code for each process is wrapped in curly brackets {}. Each process requires one or more input and can produce one or more outputs. Also mandatory is a part that contains the code which should be executed (in this case it is called shell:). Inputs and outputs get their values by connecting to channels. Channels can contain different kinds of data and Nextflow distinguishes between them. In this case we are using the path type for the input of the combine process and file for the lower process.
The bash code inside the shell parts of the processes is almost the same to what we have seen. The only difference is that we need to escape values of bash variables with \$variable because Nextflow also uses the $ sign to access its own variables.
Differently to other workflow managers we also have a directive called workflow. You can think of this as the all rule in make or Snakemake. The difference to these rules is that in the Nextflow equivalent we have to specify how the workflow should be executed. As you can see we can use pipes | to connect different processes. This is used to connect the output of one channel with the input of the next one.
Exercise
Think about how this differs from how Snakemake and make work. What is the fundamental difference? Let’s discuss.
Let us disect the line: combine(params.indir) | lower | view. The first part of our workflow is to combine all the files into one. We have to let the process know where the input is, so we pass the input to the processes (similar to a function call in almost any programming language). The files are processed and the output is piped into the next process lower which converts it to lower case and saves it to lower.txt. Lastly we pipe the output of the lower process into the view command which prints the path of the output file on screen. We have to do this because Nextflow runs the whole workflow inside a special temporary directory. This behavior can be changed, however we wanted to show you the defaults first.
Execute Nextflow
Let us execute the workflow now. We will be running nextflow from a docker container:
$ cp workflow-scripts/workflow.nf .
$ docker run --rm -it -v $(pwd):/data -w /data nextflow/nextflow:22.04.4 nextflow workflow.nf
N E X T F L O W  ~  version 22.04.4
Launching `lower.nf` [hungry_borg] DSL2 - revision: 369f0fca2c
WARN: Process with name 'combine' overrides a built-in operator with the same name
executor >  local (2)
[01/017747] process > combine [100%] 1 of 1 ✔
[08/692b7f] process > lower   [100%] 1 of 1 ✔
/data/work/08/692b7fdd0beaa7730b6e6d6f4a3d9e/lower.txt
Nextflow prints some information about what it does on your screen. You can see the two processes and that the have finished sucessfully as indicated by the ✔. The last line gives the path to the output file.
Some additional features
It is clear that our example workflow only barely scratches the surface of what Nextflow can do, and using a Nextflow workflow for this simple task is probably a bit of an overkill. However several people of spent a lot of time designing Nextflow workflows and you can download premade workflows from a community supported database called nf-core. Nextflow can interact with different cloud infrastructures like AWS, Google Cloud or Kubernetes Clusters. If you are interested in Nextflow and want to learn more, here are a few links that can get you started:
A superficial speed comparison
Now that we have written the same simple workflow we can compare how fast they execute to see if we can find a difference between them. We have prepared a small script which helps us do that. The script is in additional-data/time-workflows.sh. You will have to copy it over to the directory where you have created the different workflows. Here is how it looks:
Hint
You have to make sure that the snakemake conda environment is active!
The script will use the time command to measure how long a command runs. To get a better comparison (one individual run may finish very quickly) we will run each workflow 100 times.
Exercise
Your task now is to run this script to get an estimate of how long each workflow manager takes. Make sure that the conda activate command in the script points to the correct conda environment. What do you find?
Workflow managers wrap-up
As you saw there are different options for creating bioinformatic workflows. It is not so important which of the systems we introduced (or any other workflow maanager) we choose, but we hope we could convince you that they can be really useful. Once you familiarize yourself with either system, it will greatly improve reproducibility, transparency and portability of your work. It will also change the way you think about your analyses. It becomes easier to divide longer workflows into individual tasks. Your workflows can then be stitched together easily and parts of one workflow can be used in another. Extending workflows is also going to be much more straightforward. Here is a list of pros and cons of all three Workflow managers introduced in this exercise. Mind you this is our subjective take on this, so we are happy if you disagree with our assessment.
GNU Make
pros
Syntax is close to bash
Very little overhead
Standard tool on Linux
very extensively tested
extensive documentation
cons
lower readability of code compared to other workflow managers
not specifically made with bioinformatics in mind
interaction with HPC cluster only through
biomakeadd-on
Snakemake
pros
Lot’s of learning resources
great interop with python
easy to understand how rules are linked
very actively developed to accomodate emerging technologies
easy to learn
many available workflows
cons
Different versions not 100% compatible
larger overhead
Python makes it slower
hard to master
Nextflow
pros
rock solid integration with different cloud computing plattforms
not dependent on files to connect workflow parts
many workflows available (eg. at nf-core)
cons
More complex syntax
A lot of the available online resources are not up to date with currently used syntax (DSL1 vs. DSL2)
hard to master
less learning resources available